A newly painted interior can make a home more vibrant and welcoming. Changing the colors can improve the overall appeal and ambiance of any part of your property. Suppose you want to make significant visual changes without spending a fortune. In that case, interior painting is one of the best options.
Doing the interior painting yourself can help you save money. However, this task isn’t as simple as grabbing a brush or a roller, dipping it in paint, and applying it to the wall. It’s best to be equipped with the right skills to ensure excellent results and, of course, safety.
That said, here’s a guide you can follow to ensure safe interior painting:
Contents
Selecting The Right Type Of Paint
There are different types of paint you can use for interior applications. Each has its pros and cons in terms of techniques required, finishes, and safety. Some of the most common paint types are the following.
Acrylic
Acrylic paint, like is chemical-based. The pigment is mixed in acrylic polymer and resin, which makes the paint waterproof when dried. A lot of acrylic paint brands, like Benjamine Moore Aura, are actually known for their outstanding color coverage. In some cases, two coats are enough to achieve vibrance. Also, acrylic paint is safe to use indoors.
Latex
Latex paint is water-based. This type of paint is common in indoor residential and commercial applications since it can be purchased in bulk. Since it’s water-based, you won’t need a paint thinner for cleanup. It’s beginner-friendly due to ease of application. However, you may need to apply at least three coats for full coverage, especially if you’re using a light color.
Enamel
Enamel is an oil-based paint. It’s the paint type known for its high-gloss finish. Although it’s most common for exterior use, it’s also suitable for indoor applications, especially for kitchens and other moisture-prone areas. However, using enamel paint requires extra precaution due to its fumes.
Choosing A Low-VOC Paint
Choosing the best Interior Paint isn’t solely based on superb results. Instead, you must prioritize your safety as well. Toxic fumes from paint during application and drying can pose several health risks. Inhaling them can cause throat irritation and difficulty in breathing.
Using a paint that contains the minimum volatile organic compound (VOC) content is safe for interior use. Since ventilation may be compromised when painting indoors, low-VOC paint is the safest option. It releases low toxic fumes and doesn’t leave a strong odor for weeks.
Most low-VOC paints are water-based. Proper ventilation is still required during application. However, it poses a lower risk of allergic reactions to the throat and skin. Follow the manufacturer’s instructions to guarantee safety.
Picking The Type Of Finish
Picking the right type of finish isn’t merely for aesthetic purposes. It also affects your safety during application since the finish depends on the ingredients of the paint. For instance, you may need oil-based paint if you’re looking for a high-gloss finish, which may compromise your comfort.
Here are the different types of paint finish:
Matte
A matte or flat finish is perfect for a clean look. It’s often achieved with latex or water-based paints, which are low-VOC.
Eggshell
An eggshell finish sits between matte and satin finishes. It looks flat, but has a subtle sheen, best for high-traffic areas, like living and dining rooms.
Satin
A satin finish is more lustrous than eggshell, but less shiny than semi-gloss. It’s a perfect middle ground for those who want a flat look with some shine. Plus, there are also low-VOC satin paint finishes available.
Semi-Gloss
The semi-gloss finish is more on the shinier side. There are water-based low-VOC paints that give a perfect semi-gloss finish to your interior walls. You don’t have to compromise the gloss you’re looking for to avoid toxic fumes.
High-Gloss
High-gloss finish is suitable for moisture and dirt-prone areas. When dried, walls with a high-gloss finish are easy to wipe and clean. However, you may need extra precaution since most high-gloss paints are oil-based. Thus, it’s best to ensure proper ventilation and vacate the newly-painted room for at least a week after painting.
Following A Step-By-Step Guide
Preparing Your Tools And PPE
It’s best to start a DIY project with everything you need at arm’s length to ensure convenience, thus, investing in good-quality tools is necessary. Here’s a list of the home painting essentials, including protective gear, to ensure your safety.
- Paint brushes
- Paint rollers
- Roller tray
- Painter’s tape
- Sander
- Putty knife
- Wall putty
- Drop cloth
- Cleaning cloth and brush
- Wall cleaner
- Gloves
- Face mask
- Protective eyewear
Finally, safe interior painting requires following a DIY-friendly step-by-step guide. This included the following steps:
Clean The Walls
After preparing all your materials and tools, you may now start cleaning the walls. You may use a store-bought wall cleaner, dish soap, water, a wet cloth, and a cleaning brush. For stubborn stains, a water and vinegar solution would help.
When painting a wall with wallpaper, peel it off first before cleaning. You can easily scrub off the remaining adhesives and dirt with a wall cleaner. When everything is clean, wipe the surface with a damp cloth and let it dry.
Repair The Cracks And Holes
Cleaning the walls reveals the cracks and holes that need repairing. To ensure the surface will be flawless after painting, fix these first. Grab your wall putty and putty knife, and carefully fill these tiny imperfections.
Prep And Prime
After repairing the cracks and holes, you may now proceed with sanding to prep the walls. It’s best to wear your protective eyewear to protect your eyes from dust. Again, wipe the surface with a clean damp cloth to remove excess dust.
When everything is clean, you may now apply the primer. It helps the paint adhere stronger to the walls. It prevents peeling and bubbling, ensuring expert-level results.
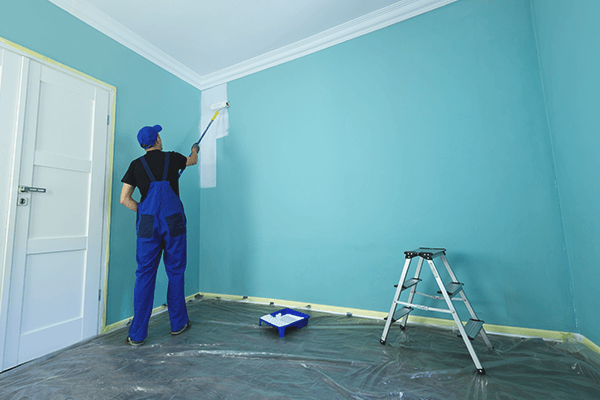
Start Painting
Once the primer has dried up, you may now start painting. Depending on the paint you’re using, you may need to apply two to three coats. The drying time between each coat would depend on the manufacturer’s directions. The fastest-drying paint is latex, which only requires four hours of waiting time between coats. Applying the next coat too early can cause peeling and patching, so it’s best to take your time.
Conclusion
Painting interior walls by yourself isn’t as complicated as some might think. You can achieve your desired home makeover when you’re equipped with the right skills and all the essential tools.