Old and deteriorated grouts lines are ugly to look at and even make your space (kitchen or bathroom) look rough and unkempt. No matter how sealed and solid grouts may seem, they can deteriorate over time, especially if constantly exposed to liquid. This is why the grouts on your bathroom floor, as well as those on the lower tiles on your walls, tend to crumble faster than others that barely come in contact with water and other liquids, making them difficult to clean and somewhat a mess to look.
Regrouting is the perfect solution for this problem; although, you don’t have to wait until the grout lines are a mess to look at before you find a solution. In other words, if you want to add some colors on your ceramic tiles to complement your home décor or add a new look to your space, you can easily regrout to achieve this.
Can You Regrout Over Existing Grout?
The answer is pretty straightforward; yes, you can regrout over an existing grout. We do not entirely rule out the fact that you can remove old grout before regrouting but are you ready to go through the stress of having to saw out or chisel through the entire old grout and spending much time and effort on the job? Nonetheless, grouting over the existing grout is a basic home project that you can easily handle yourself. This process will save you some time and money and also give the new grout a solid surface to bond to.
How to Regrout Tile Without Removing Old Grout
However, regrouting over existing grout doesn’t mean you have to start filling the spaces or channels with new grout without doing some groundwork. Since you are here, it means that you are interested in knowing the right to apply grout over grout. So, continue reading to learn how to achieve this yourself without the help of a professional. After all, grouting does not require any special skills or large equipment.
Get your materials in place
There’s no doubt that cement is the most common material used for grouting; however, epoxy grout is better because it has a superior bonding quality and does not absorb water easily like cement grouts. Also, the epoxy grout comes in various ranges of colors and finishes, giving you extensive options to choose from.
Materials you will require to regrout include carbide-tipped scrappers to remove some fragments of the dirty and crumbling grouts up to 2 millimeters. If you don’t have a scrapping tool, substitute for a hammer and screwdriver even though it may not be convenient to use. A brush or handheld vacuum cleaner is also necessary for cleaning the area so that no dirt or grout crumbs get in the way when regrouting. You will need a grout float to apply the grout, and a bucket of clean water plus a sponge to remove grout from the tile surface when you finish.
Other optional tools and materials you will need include;
- Eye protection
- An oscillating tool with grout removal blade
- Plastic sheeting to confine dust
- Margin trowel
- Utility knife
- Grout pigment
- Grout haze removal
Create a channel for the new grout
Removing old grout and creating space for a new one is a messy and time-consuming job. If you have a 16-square foot tile section, be ready to spend at least two hours scrapping off some part of the old grout to create channels for the new grout. While doing this, ensure that you have a mask on to prevent inhaling the dust.
Have a clean work surface
Once you clear the channel, vacuum out the dust and debris to keep the grout line clean and dry before applying the new grout mixture. Work the vacuum tube through all the grout lines to suction away even the tiniest particles you cannot see. After this, wipe down the entire area with a damp cloth and leave to dry before you start filling out the lines with your grout mixtures.
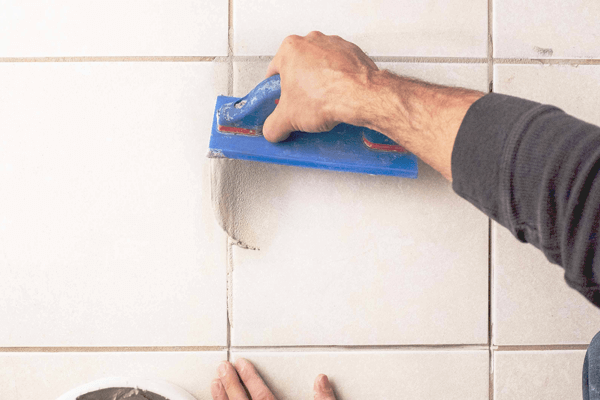
Spread the new grout over the grout lines
You can find tile grout in a powdered state, which you have to mix yourself or premixed semi-liquid paste in tubes of various sizes. The instructions for grouts vary with the product. So, if you opt for a powdered grout set, mix it according to the directions on the package and use a grout float to apply the mixture into the spaces (just like you would if you were grouting a new project).
Note that both the powdered and premixed grout set comes in various colors, but if you want to be creative with colors, you can buy grout pigment and add it to the grout mixture before use.
Scoop a significant amount of the mixture on the rubber grout float and move it diagonally across the grout lines. Afterward, continue to press the float hard onto the tiles to fill the grout into the spaces between the tiles and pack it firmly. Damp the sponge in clean water and wipe it over the tiles, across the grouted area, and smoothen out the edges. Cleaning the joints and tiles is a slow process. Continue to move the damp sponge across the joints and tiles without exerting too much pressure until all the excess grouts are off.
Note that regrouting is not something you rush through. If you are handling it yourself, you will want to put in the time and effort to make it look professional. You don’t want to go over the process again in a few months because it was improperly done.
Conclusion
To have your grout last over years and not let your hard work go to waste, we suggest that you use a silicone grout sealed, especially if you used powdered grout because it is not entirely waterproof. Allow the grout to sit for about 48 hours before applying the sealant.
While regrouting isn’t a difficult task, the condition of the old grout may decide whether you should handle the project yourself or get the help of a professional. If you decide to do it yourself, then the steps and information we provided above will help you get it done the right way.