Plumbers putty is the go-to solution for every plumbing problem. Leaky pipes, installing new sinks or strainers, you name it. All of these problems can be solved by using one product, and that is plumbers’ putty.
So, what is the plumber’s putty? It is a clay-like material that acts as a sealant for any leakage. It can fill right through the cracks and stop any leakage. The clay-like putty is soft and elastic, so it can take any shape you want.
Sounds impressive, right? But there’s a catch. Without knowing how to use it, you might end up making a colossal disaster. So before getting into work, you need to know plumbers putty works.
Plumbers putty(Check on Amazon) has multiple purposes. It can be used to seal the faucets’ base, other fixtures of the sink, or sink strainers. They are mostly used to stop leakage from pipes and faucets. Silicone may seem like an ideal choice for sealing leaky pipes, but they are hard to work with. At the same time, plumbers putty is very easy to use.
Uses of plumbers putty on the kitchen sink
Here are the uses of plumbers putty for the kitchen sink
Installing a kitchen faucet
The most common use of plumbers putty in the kitchen is installing a kitchen faucet. The faucet has nuts and bolts to prevent any water leakage, but the faucet base does not have any bolts. So it’s preferable to use plumbers putty instead. It can seal all the areas surrounding the faucet, ensuring maximum leakage protection.
First, turn off the water beneath the sink. Clean out the area beneath the sink. Mainly the place in which you will work on. If you put plumbers putty in an area where there are dust particles, then the putty might not work effectively. So cleaning the area beforehand is essential. After cleaning the area, wipe it with some rubbing alcohol. The next thing you need to do is hand-tighten all of the connections and connect a water line to each of the faucets.
Do not overtighten it because it will cause the lines to leak. Now, heat the plumbers’ putty slightly by keeping it beside a radiator. Then take the required amount of putty and roll it between your palms. You will notice how soft the putty is because of slightly heating it.
Make sure the diameter is slightly bigger than the size of the faucet. Apply the putty to the base of the faucet deck plate. Carefully press it down all around the circumference of the deck plate.
Then you have to insert the water lines into the holes from above the sink. Put the faucet base in a straight position and carefully press it. If there is any putty around the plate, wipe it with a damp cloth. Slide the friction washers up to the top of the faucet tailpieces and tighten the mounting nuts. After hand tightening all of the connections, turn on the water valve. Check whether there are any leaks; if there are, then tighten the bolts again.
Installing a kitchen basin
Plumbers’ putty can also be used in installing a new basin sink. It is easier to use putty instead of silicone caulk. Putty lasts longer as well.
Installing a new sink may seem like a huge deal, but it’s not that hard. Firstly, mark the center of the cabinet and place the sink template on that mark. Stick the template in the center by taping it and outline with a marker. Next up, you have to remove the template and drill holes in each corner of the template. Then apply masking tape on the outer side of the lines. Cut along the insides of the lines with a jigsaw. Lift the cutout and put it aside. Then you have to put the sink in the opening.
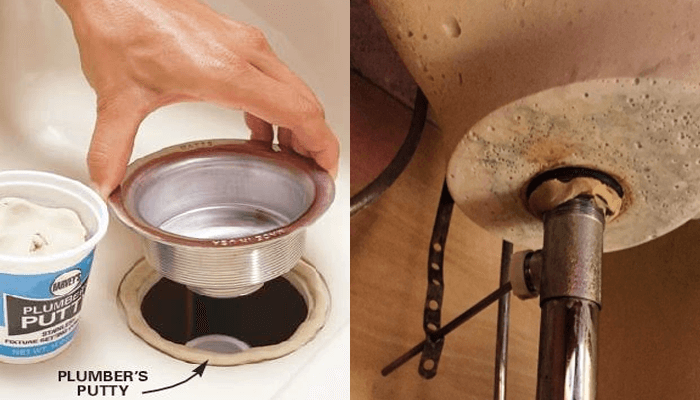
After doing this, cut holes for the faucet. Adjust the diameter of the hole carefully and cut accordingly. You’re almost done now. Turn the sink upside down and insert the faucet tailpieces. Here’s where you will use the plumber’s putty now. Roll some of it and press it around the bottom of the sink strainer. Place the strainer and secure it properly.
And then you have to tighten the lock nut on the bottom of the sink. Here comes the tricky part. Roll another ball of putty and apply it around the edge of the cutout. Insert the sink in the opening and press it down slightly to secure it. After tightening all of the required bolts and screws of the sink and wiping out the excess putty, you’re all good to go!
Uses of plumbers putty on the bathroom sink

It’s just as easy to use plumbers putty on your bathroom sink as it was with the kitchen sink. The putty will last for years.
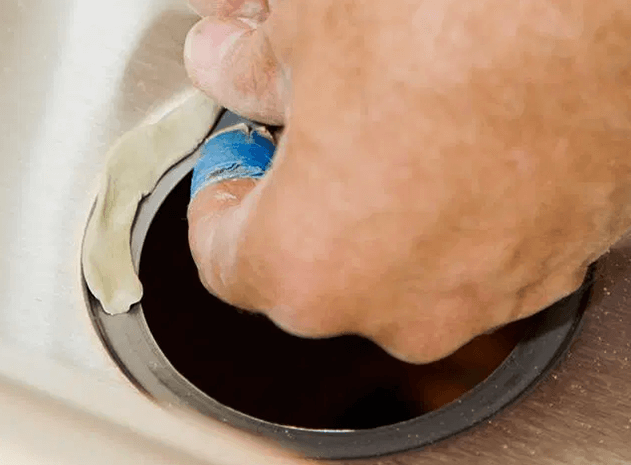
At first clean the sink area in which you will install your new drain. Wipe it with a wet towel. Roll some plumbers putty in a rope-like structure and apply it around the drain area in a circular way. Press the putty properly and put the sink drain on top of it. Slightly press on the drain sink and tighten the sink drain with a pipe wrench. Remove the excess putty from the sink drain. Here you go, you’re all done!
Final Words
For any plumbing problem, plumbers putty will be there to save you! This multipurpose clay-like adhesive product has a versatile use. Its versatility is what makes it so worth it.
Many people are entirely clueless about how to use plumbers putty for their bathroom or kitchen sinks. It may seem very hard to use, but it’s effortless. The putty can stop any leakage and can fill right through the gaps. Best of all, it can last for years.
But the right application is essential for getting good results. So, we hope that this article will help you use plumbers putty for your kitchen and bathroom sink!