Whether it’s your broken chair, broken faucet, or broken tile floor, you can just bond anything with liquid nails. You can find a ton of all-purpose construction adhesives out there like Fuze*It Max. They deliver the strongest performance no matter what you are going to bond- with a combination of exceptional hold & instant initial grab.
But what will it be if you are a first-time DIYer to use the adhesive? What do you do if you don’t know how to use liquid nails? Take a deep breath!
We will break down the way of using liquid nails with or without a caulking gun. Also, we will cover how to apply liquid nails on different surfaces. So, let’s get started right here.
Two Using Methods of Liquid Nails
You can use liquid nails in two ways- with a caulk gun or without it. From this chapter, you can learn how to apply adhesive like a pro that will bond two broken pieces of furniture or materials.
How to Use Liquid Nails with a Caulking Gun
- Start with loading the caulk gun. To load the caulk gun, you should pull the rod back a bit from the frame. Regarding this, press the trigger with your thumb, which will loosen the rod that runs through the frame. Use your other hand to pull it back and hold it.
- Load the gun by inserting the liquid nail tube and place it into the gun frame. Make sure you keep the flat end of the tube into the back of the fun and place the nozzle into the front part. Press the trigger a couple of times so that the plunger can contact the membrane.
- Now, it’s time to cut the tip of your liquid nail tube. Every caulk tube has a nozzle. Cut it according to the size of the crack. Use a sharp knife, or the gun may have a hole to cut the tip.
- Before applying the liquid nails to the affected area, test whether it will flow in the right direction or not. For this, squeeze the trigger a few times and apply it over a piece of paper.
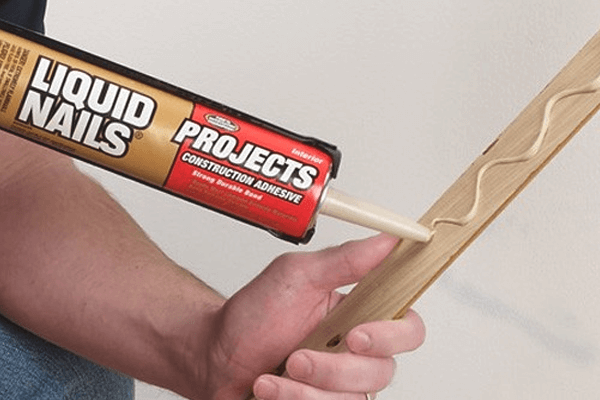
- Hold the caulking gun with your two hands. Place a hand at the back of the gun and keep your finger on the trigger. And keep the other hand at the end of the nail tube to apply the adhesive on the right spot.
- Finally, leave the liquid nails to cure. It takes 12-24 hours to dry the adhesive in every condition.
How to Use Liquid Nails without A Gun
Applying liquid nails without a caulking gun will be a messy workflow. However, you can follow the below steps to make a bond using adhesive without a gun.
- Choose a liquid nail that matches the color of the applicant you want to bond. Cut the tip of the tube with a sharp knife at 3/16 wide on an angle.
- Use your dominant hand to grab the tube and wrap the end of it to squeeze out the adhesive. Make sure you align the tip of the liquid nail tube with the cracks. Then, press the tube with your hand to fill the cracks with adhesive.
- Don’t forget to wet the tip with water to smooth out the adhesive. Let the liquid nails dry.
How to Use Liquid Nails on Tile
You can apply liquid nails to put together any broken materials, maybe it would be tile, concrete, plastic, wood, or other. From this chapter, you can learn how to use nails on tile following the step by step guide.
- Before applying liquid nails to bond tile or concrete, clean the surface and the tile thoroughly. Otherwise, the adhesive will fail to create a strong bond.
- Use a sharp knife to cut the tip at a 45-degree angle. Make sure you wear a rubber glove to protect your skin from the adhesive.
- Apply the adhesive on the edge of the tile and also on the surface.
- Keep the tile in its place and press it against the tile floor to spread the liquid nails. Don’t forget to use a cloth to wipe away excessive adhesive that oozes out.
- Finally, leave the tile for 24 hours to cure the adhesive.
FAQs
How do you apply Liquid Nails?
First off, lay the item down you want to put together. Then, use a caulk gun to apply the liquid nails on it by pressing the trigger. Press the stuff against the other item. Let the adhesive cure by leaving it for 24 hours.
How long does it take for Liquid Nails to set up?
It takes 15 minutes for Liquid Nails to set up. However, it depends on humidity and temperature how long it will take to cure.
What do you use Liquid Nails for?
You can use Liquid Nails for putting together any broken materials like a broken chair, leaky drain pipe, or broken tiles.
Can I use Liquid Nails without a caulking gun?
Yes, you can use Liquid Nails if you don’t have a caulking gun. In this case, a T-shaped stick will be your best choice to use this adhesive.
Is Liquid Nails permanent?
Yes, Liquid Nails is permanent, and it is specially formulated to bond any broken materials.
Conclusion
Liquid Nails are widely used repairing adhesive to bond different elements & materials.
No matter what you are going to put together with it, we recommend you clean both the item and the surface before applying the Liquid Nails. Otherwise, the adhesive doesn’t create a strong bond.
Follow the steps we mentioned above to use Liquid Nails. And don’t forget to leave a comment below if you have any questions related to this topic.