Sensitive things need something caring. It goes for your sensitive skin, hair, and the vinyl floor of your home. We know the comparison is a bit drastic, but it’s true. Unlike wood or lamination, vinyl is more sensitive, so they need a gentle chemical for cleaning.
Vinegar is acidic, and the sour taste says it all. This acidic nature not only destroys the microscopic dirt but also kills germs that can cause cold, flu, and many more ailments.
Before digging into the vinyl floor cleaning steps, let’s get familiar with vinegar: an excellent chemical perfect for both food and floor! How cool is that?
Why Should You Use Vinegar to Clean Vinyl Floors?
Vinegar is acidic, and vinyl is a sensitive material. You must be wondering how these two will move on together? Well, the acidic nature of vinegar removes the oil and dead cells that hold the dirt to the vinyl.
Vinegar does all of these great jobs without damaging the chemical integrity of vinyl. Moreover, unlike soap or other chemicals, vinegar does not leave any residue on the floor. Isn’t it amazing?
If you are looking for hardcore cleaning, try white vinegar. According to the pH value, they are more acidic and work vigorously on the dirt holding grease. But when the good smell is equally essential with excellent cleaning, apple cider vinegar is the perfect option.
So choose the right vinegar type based on your requirement and feel the freshness. Now let’s see how you should use them to have the maximum cleaning.
How to Clean Vinyl Floors with Vinegar?
Vacuum the Floor
Vinegar works best on the micro dirt. Thus, when you have some stubborn patches or marks on the floor, vinegar will do the magic. Contrarily, this acidic chemical is not effective at all on the big dirt and specs.
So before you use vinegar to clean the vinyl floor, vacuum it properly. Especially the corners and under the baseboard should be on your target. Most of the larger debris stuck to those places.
If required, run the vacuum multiple times on the floor to get rid of the sharp debris. Otherwise, when you mop, those sharp edges will leave scuffs on the floor.
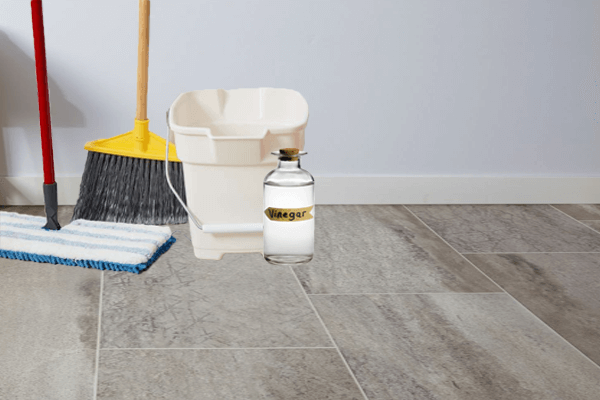
Make a Vinegar Solution
Vinegar may be strongly acidic, but when mixed with water, it becomes mild. The strength is perfect for cleaning the vinyl without damaging the material.
Take a cup of vinegar and mix with one gallon of water. It reduces the acidic power of the vinegar but does not affect its potency to attack the dirt.
One of the best things about this solution is it works as an excellent deodorizer and sanitizer. Try it after a big Friday night dinner to clean the messy countertops and tables.
Mop the Floor
You need either a mop or a soft cloth to apply the vinegar solution on the vinyl floor. Anything hard or too rough will damage the vinyl with scratch marks on the surface. If you are not sure about the cloth, take a cotton towel, and work correctly.
Soak the mop or towel into the vinegar solution and gently squeeze any excess water. Leaving too much water on the vinyl will hamper your cleaning in two ways. Firstly, it will leave puddles on the floor, and secondly, excess water will make its way into the joints.
In both ways, you will end up damaging the vinyl rather than cleaning.
Mop the floor with the towel or mop rinse frequently to prevent the spreading of dirt. When you are dealing with stubborn dirt, add some dishwashing soap with the mixture. It will cut down the cleaning time and effort.
In the case of cleaning stains, make a mixture of baking soda and vinegar and apply it. Take a soft cloth and rub the stain using the strength of the soda and vinegar.
Let it Dry
You have done all the hardwood cleaning the vinyl. Now, it’s time to let the floor get dry.
It is essential because if you start putting the area rug or furniture back on the wet floor, the moisture will be there under them. Eventually, that trapped moisture will do more damage than the dirty vinyl.
Use a fan or blower to dry the floor. Keeping the windows open will add extra benefit to dry off the floor quickly. Wait for at least 30-minute for complete drying.
Now you can enjoy the freshly cleaned vinyl floor and bring all the area rugs and furniture in place.
Vinyl Floor Maintenance Tips
Vinyl is sensitive, but they are an excellent choice for flooring. If you can maintain them correctly, no wonder those synthetic planks will offer you the most pleasing and soothing experience at home.
Besides, you can make the guests really envious, making them wonder, “How is that floor looking so shiny than mine?” If you want to make it happen, there are a few proven tips for vinyl floor maintenance.
- Use mats at the entrance to stop any large debris from getting on the vinyl surface. They are the reason behind scuff and scratches on the floor.
- Regular sweeping is the key behind a shiny vinyl floor. So sweep the vinyl floor regularly to remove all the dust.
- If there is any spill, clean it immediately. Spills can penetrate through the joints and affect the subfloor. It will eventually damage the vinyl both from above and below. Have a spill kit handy, especially during a party or when kids are around with soda.
Will vinegar damage vinyl floors?
Using vinegar is a safer option to clean vinyl floors properly. It won’t cause any real damage to your vinyl floor.
But remember, repeated usage of vinegar can damage the top surface of the vinyl floor. So over time, it can take away the shine of your vinyl floor and cause a dull appearance.
Most importantly, you have to be cautious in choosing the right kind of vinegar as you will find different kinds of vinegar in the market. So wisely choose the right type that can serve your vinyl floor better.
Final Words
The enigma about how to clean vinyl floors with vinegar is busted. All you need is a cup of vinegar appropriate for your cleaning needs in a gallon of water. Mop or soft clothing will do the rest.
Vinegar is like a jack of all trade. From turning a dish tempting to making vinyl flooring shining, it will ensure you have the best experience in the end.