Staggering laminate planks is the right decision if you want to install the flooring yourself. It gives the floor stability and adds an aesthetic touch to it. But it is important to know how to install it without making a mistake. While you can find several tutorials online, most of them are confusing. Thus, you must read this guide if you wish to learn how to stagger laminate flooring yourself.
Stagger laminated planks are a great option as they can last for several decades without causing fixation issues. There will be no gaps, loose planks, or other problems which you usually have with other flooring options. Let us have a look at how much you should stagger the floor?
How Much to Stagger the Floor?
There isn’t a fixed recommendation as to how much you should stagger the floor as it depends on the instructions the manufacturer provides. However, most experts suggest staggering these planks in the range between 6″ and 12″, but it is best not to go below this limit. You can always go above the 12” mark and customize your flooring accordingly.
Keep in mind that a successful staggering looks a little uneven when you complete it. So, if the manufacturer has specific instructions for installation, you should stick to them. Let us take a look at some steps you should follow to stagger laminate your flooring.
Step By Step Guide to Stagger Laminate Flooring
Following are the steps you should follow to stagger laminate your flooring.
Prepare the Room
Start by removing any joints in the flooring and the base point; else, they will make the floor installation process harder to complete. Similarly, remove any obstacles you find on the wall or the flooring as they can cause a problem later on. Ensure cleaning the surface with a broom and prepare for the next step.
Prepare the Subfloor
You cannot install the stagger laminate flooring if the subfloor is not smooth, firm, and flat. You need to ensure that the subfloor is as flat as possible to install the planks easily. What’s the best part? You can stagger laminate and place it on top of other floorings as long as they are smooth and flat.
Place the Planks on the Subfloor
You need to check by placing the staggering laminate planks on the floor to see if they lay flat. You can move to the next steps once you accomplish this one. You can also check how the planks will look by arranging them as per your desired design.
Add Underlayment
Underlayment is flooring or roofing material added before installing the planks to provide an additional layer. Start by measuring the room you want to work on and see how many underlayment sheets you need. Adding the underlayment will help you deal with moisture, sound, and thermal isolation in the flooring. You can also fix smaller bumps in this step and ensure a professional outlook.
Mark the Expansion Gap
The concrete expansion joint or gap is the difference between two laminated planks that form a break between the concrete and other flooring parts for maximum support. This allows movement on the surface without putting too much force on the floor, securing it from potential damage and deterioration. This expansion gap should be half an inch from the wall and other objects that you place in the room.
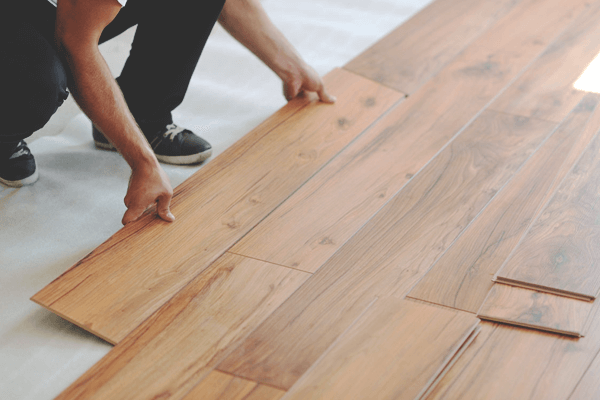
Start the First Row
Setting the first row in the stagger lamination includes making an irregular pattern with the planks you want to use. We know that laminate planks that you buy have the same length, which makes it impossible to make an irregular design. However, this is where you use the staggering method.
The best approach is to go from left to right in the room when you do this step to avoid expansion gap problems. Place the planks with the trimmed part along the walls. Keep a measuring tape with you at all times. Continue adding the planks until you complete the first layer on the whole floor area. You may also have to cut the last plank as it will probably not fit into the floor.
Start the Second Row
You can use the plank you cut from the first layer as your first plank, which makes it easier to make an irregular flooring design through staggering. If the last plank from the first layer is too short, start your second layer by cutting the plank to a random length. Ensure never to add pieces that are shorter than 16″ as they won’t serve the purpose. You can repeat this process for as many layers as you wish to add. These laminate planks usually have a click and lock feature, so hold the planks at a 45-degree angle when you add them to the flooring.
The Final Row
The final row is perhaps the most difficult step as the planks may not fit into the flooring because of their size. However, you can cut them with a jigsaw or a table saw, keeping the expansion gap in between. Following all these steps will get your stagger laminate floor ready in no time!
Some Staggering Patterns to Avoid
Following are two of the staggering patterns you should avoid when installing laminate planks.
- H- Joints
- Step Pattern
More on LivingProofMag
Does Laminate Flooring Need to Acclimate
How to Dry Laminate Flooring with Water Under It
Can You Use Swiffer Sweeper Wet Mop on Laminate Floors
Bottom Line
Installing a laminate floor may seem like a lot of work, but it certainly gets easier if you follow the right steps. You can easily stagger laminate following our step-by-step guide. Take some time to plan your floor before you get started for the best results.